Installing the SailViewer App on Mac
Running SailViewer on a Mac requires a few extra steps, but once it is set up, it provides one of the best user experiences. Follow the steps below to get started.
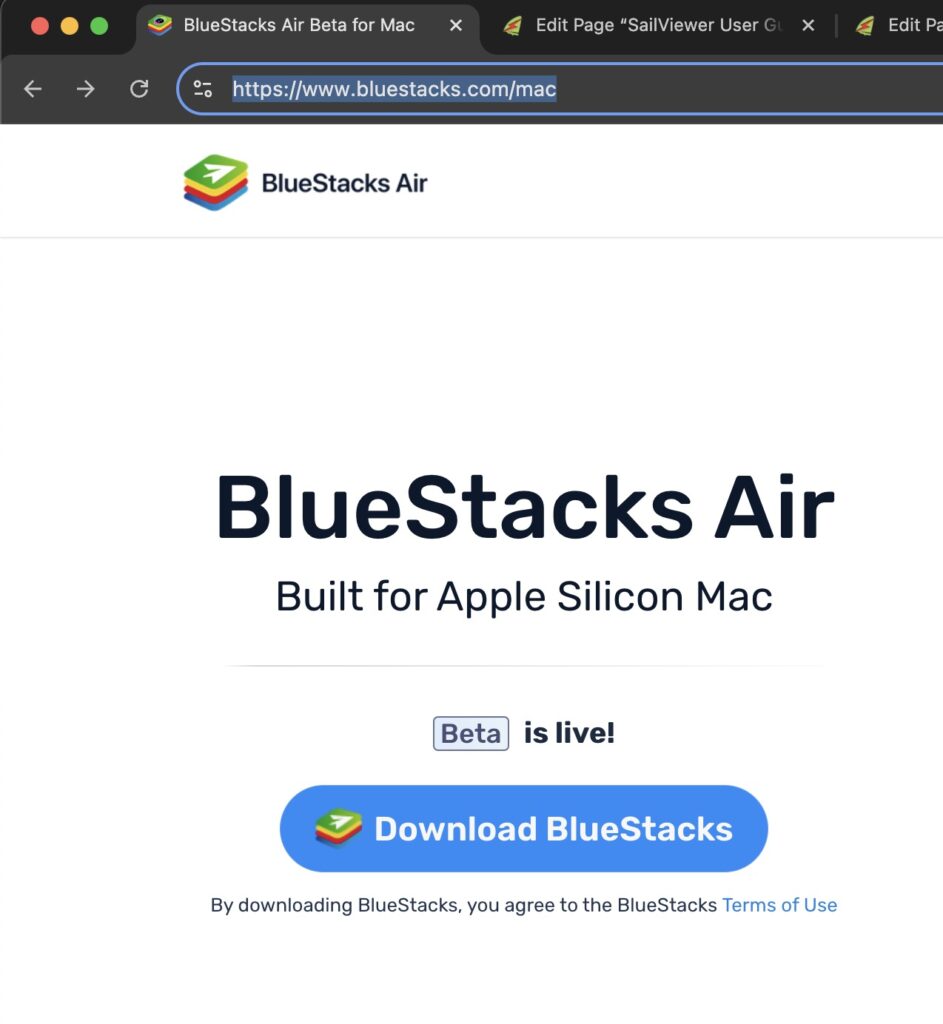
New: install easily and quickly with the BlueStacks emulator, now available on macOS.
Download and install the BlueStacks Air app from here: https://www.bluestacks.com/mac
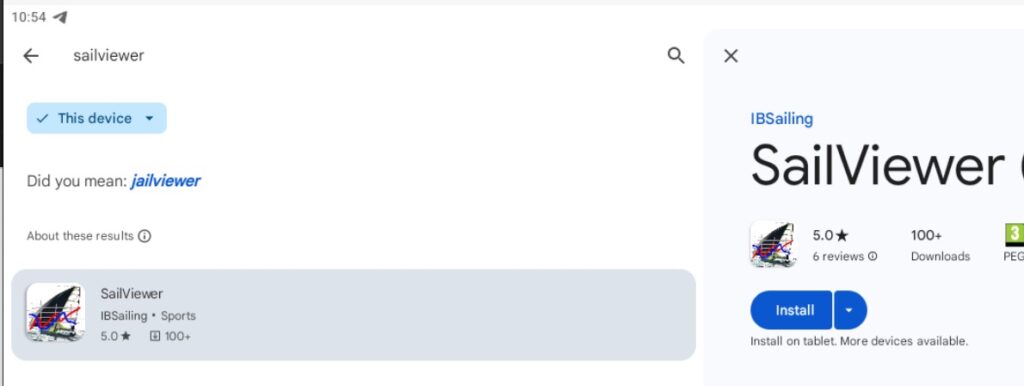
Once BlueStacks is installed and running, search for SailViewer. It will redirect you to Google Play. Log in with your Google account and install the app.

Finding Files in BlueStacks
You can drag files directly from Finder into the BlueStacks app. Once transferred, they can be imported into SailViewer.

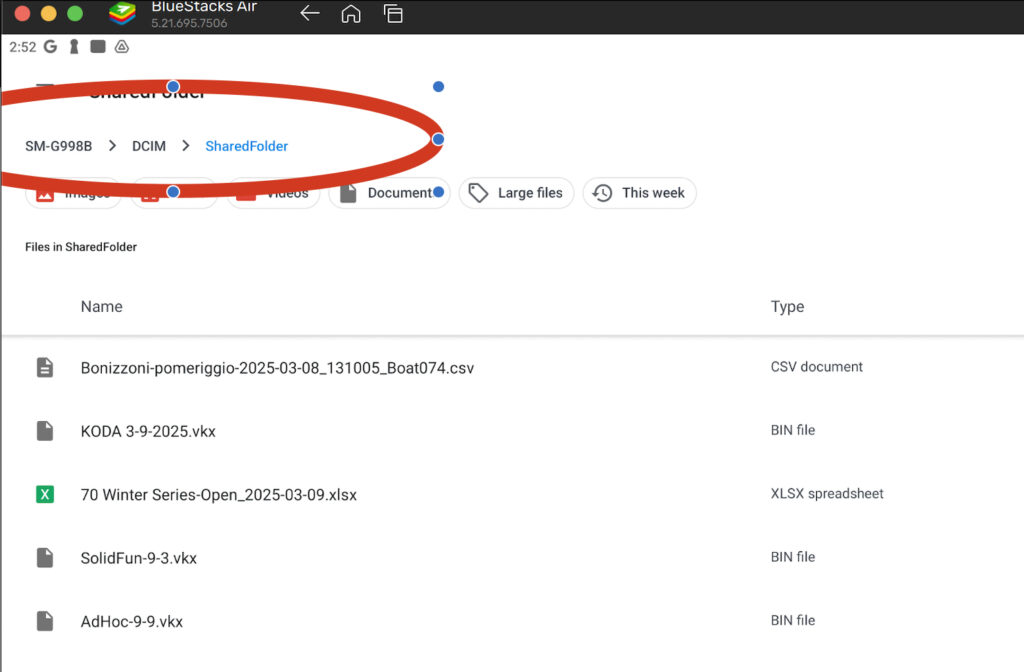
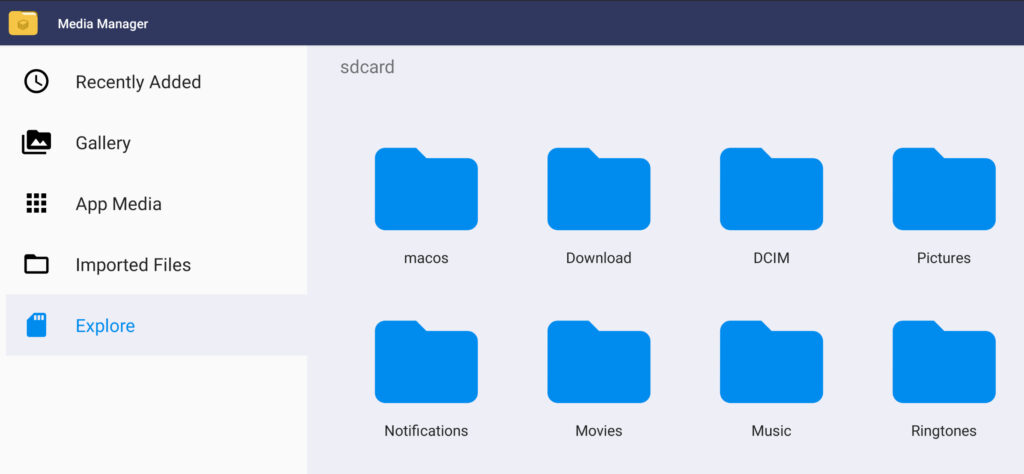
To view saved screenshots, open Media Manager in BlueStacks and find them in Pictures/SailViewer.

Install via Android Studio Development Tool, only if BlueStacks option doesn’t work
Download the latest version of Android Studio from the official website: Android Studio. Make sure to select the correct version for your Mac chip (Intel or Apple Silicon).
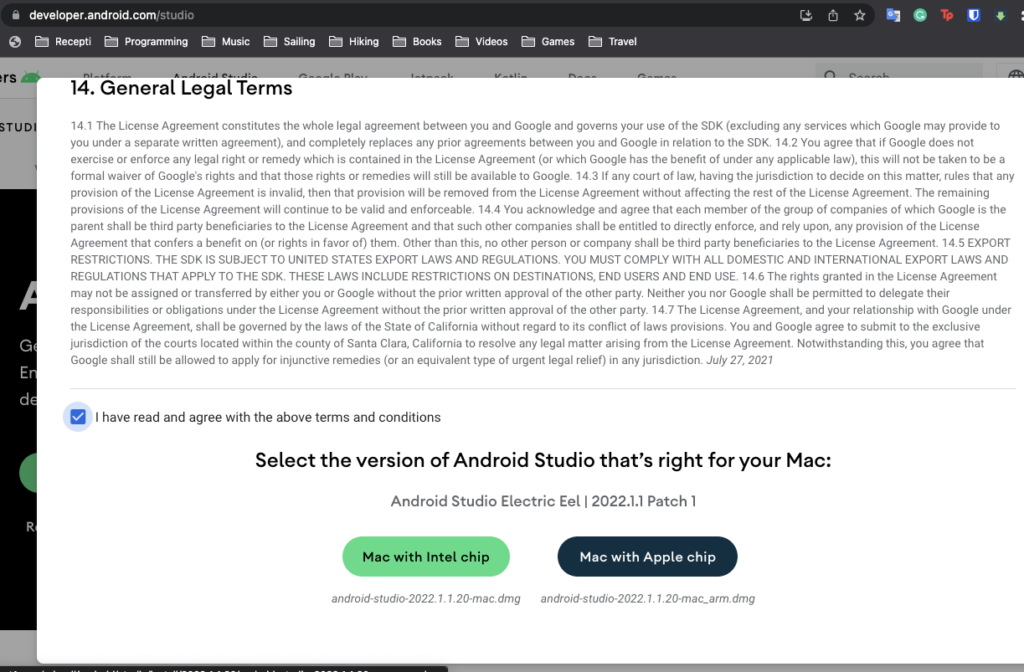
• How to Check Your Mac Chip:
• Click on the Apple logo in the top left corner of your screen.
• Select “About This Mac”.
• If your processor is labeled M1, M2, M3, or M4, choose the Mac with Apple Chip version.
• Otherwise, select the version for Intel chips.
• Note: All Macs purchased after 2020 use Apple Silicon chips.
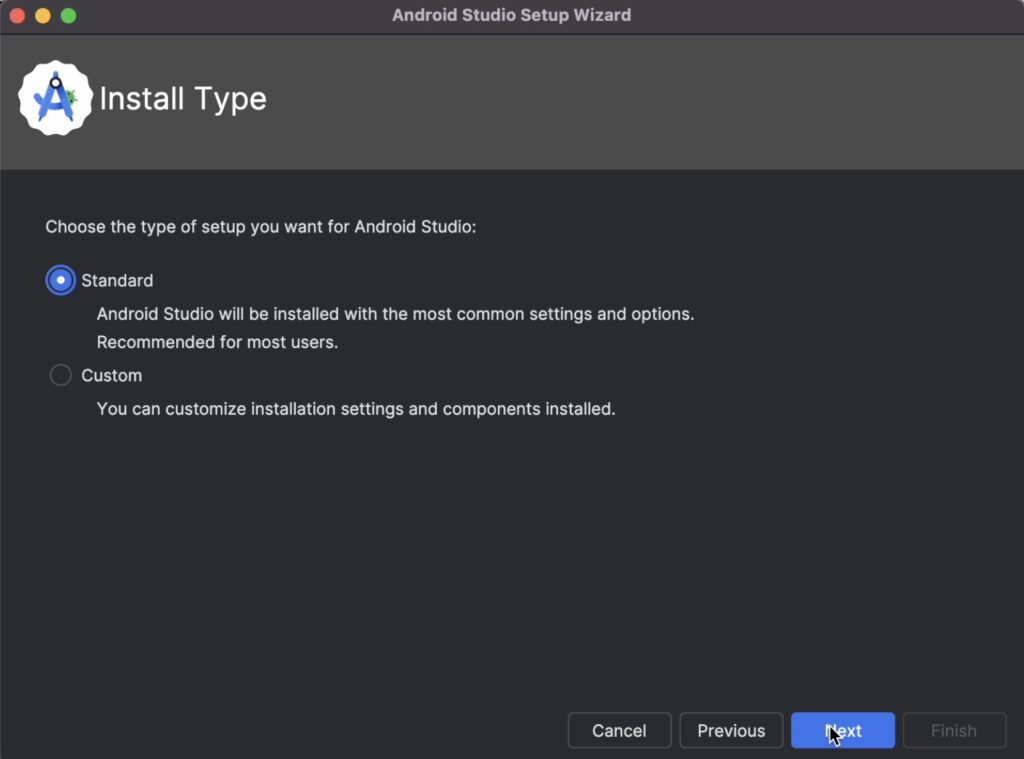
Install the Android SDK
When you first launch Android Studio, Choose standard type of setup.
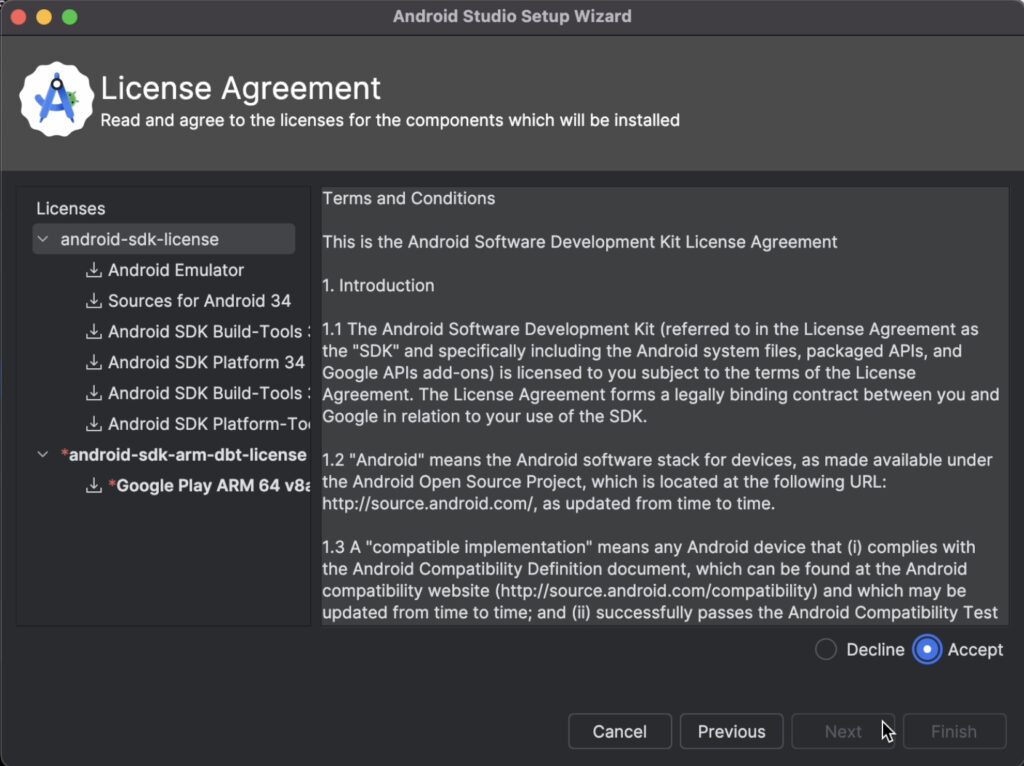
Accept license agreement for both sections. Only then, the Finish button will be enabled.
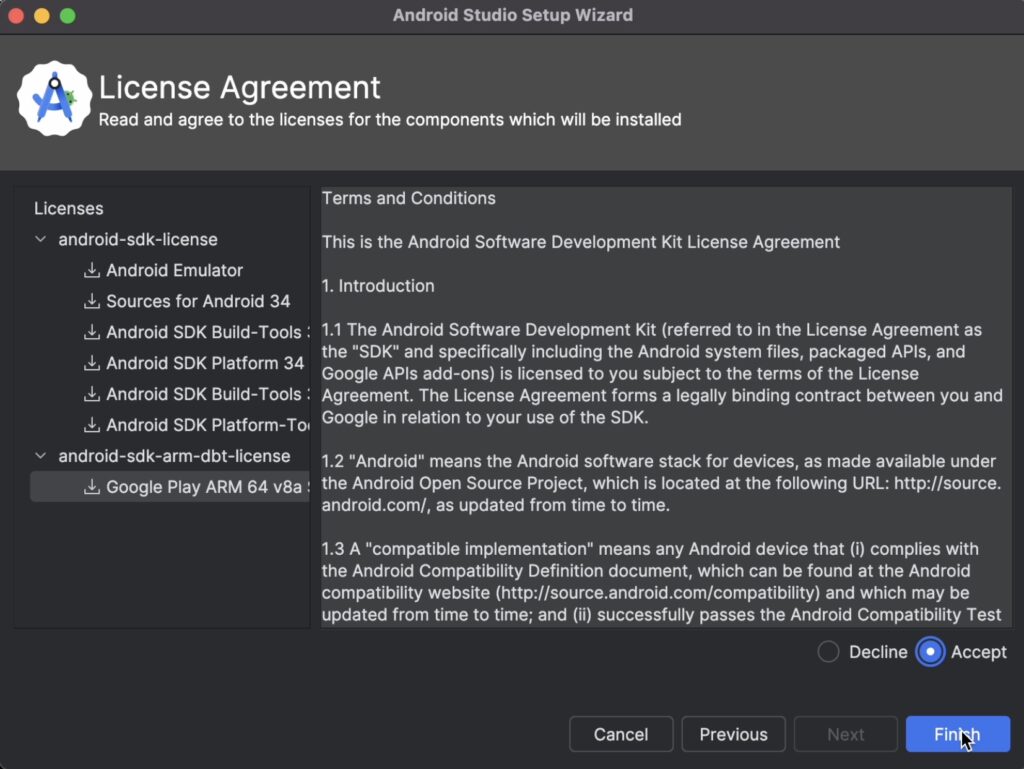
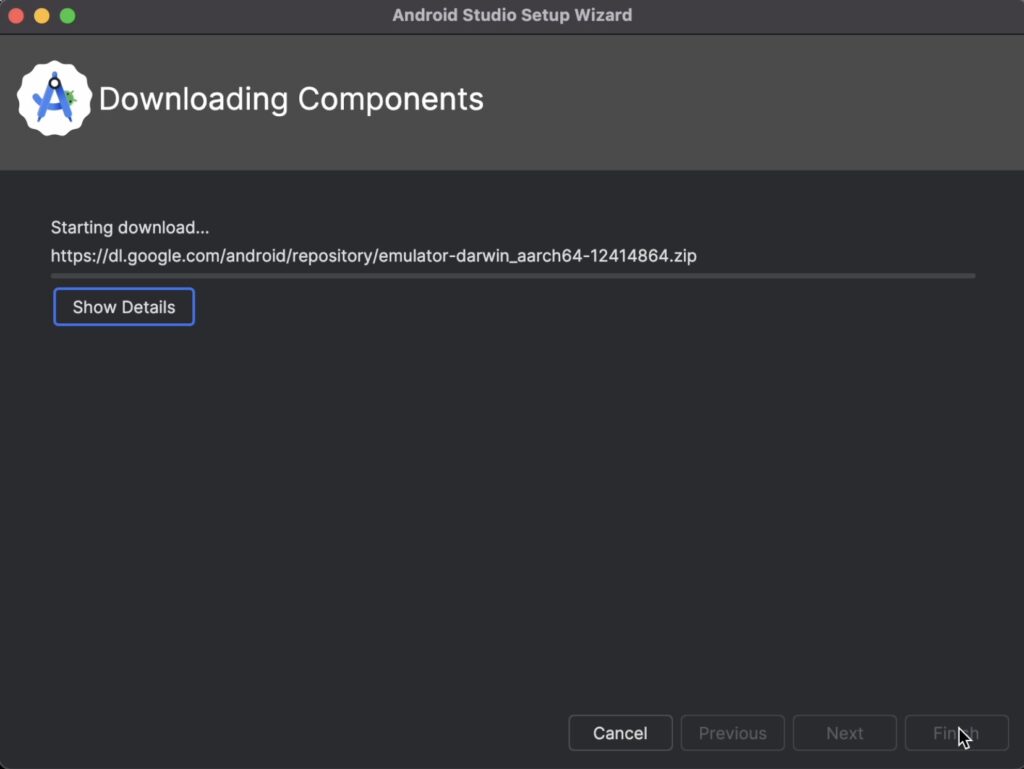
Components will be downloaded. Once they are done, click on Finish button
Create a New Project
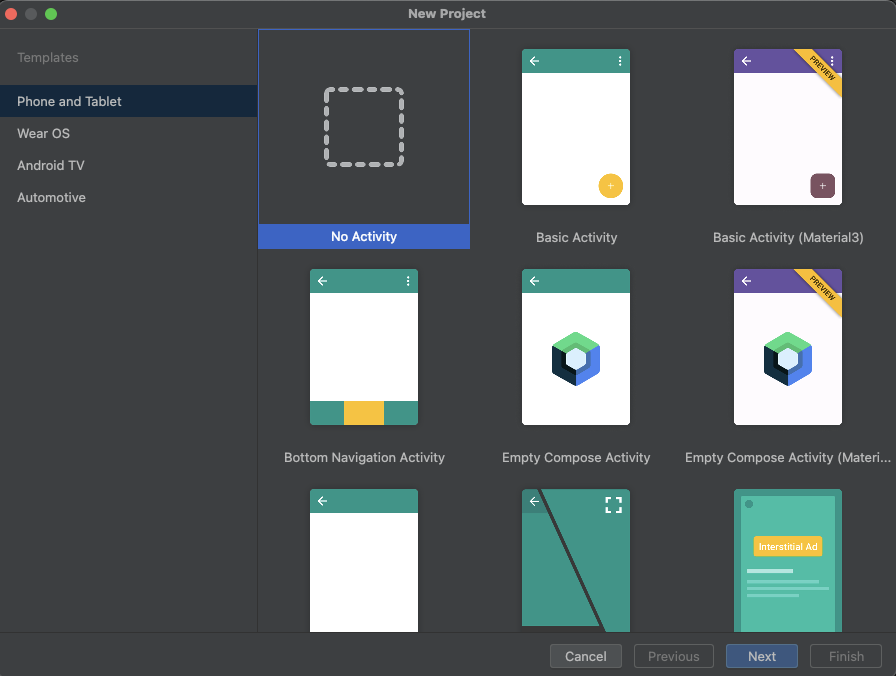
After installing Android Studio, open it and create a New Project:
• Choose “Phone and Tablet” as the project type.

• Select “No Activity” as the project template.
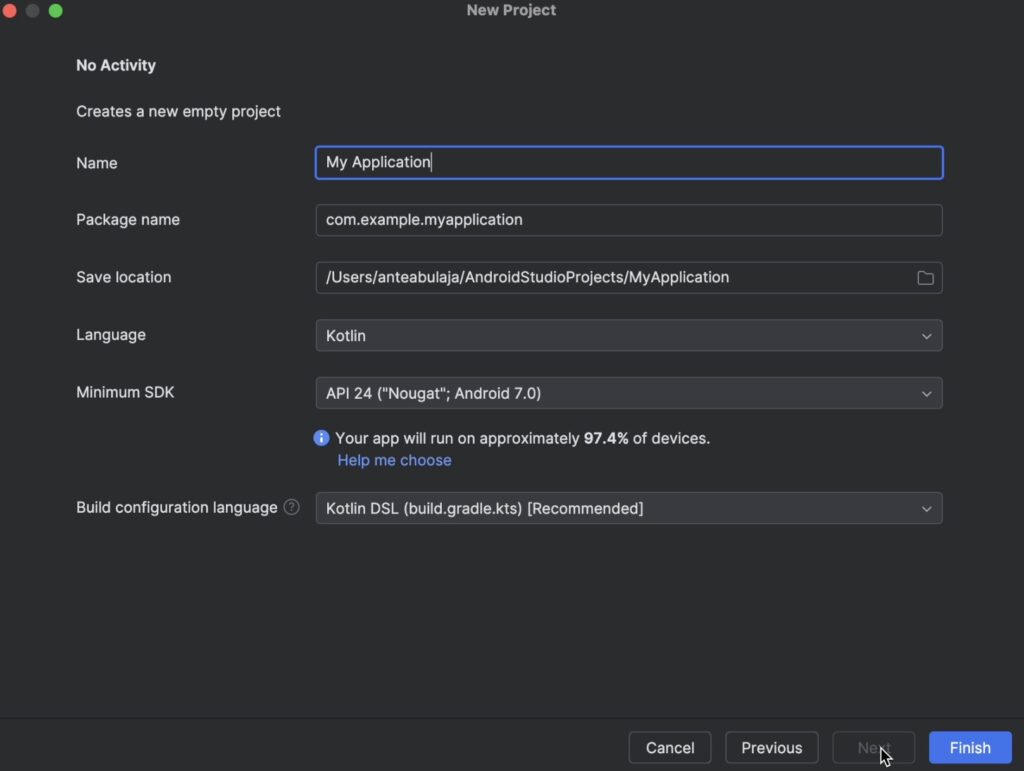
Leave everything as is. The project is not important for us, just is needed to start the emulator.
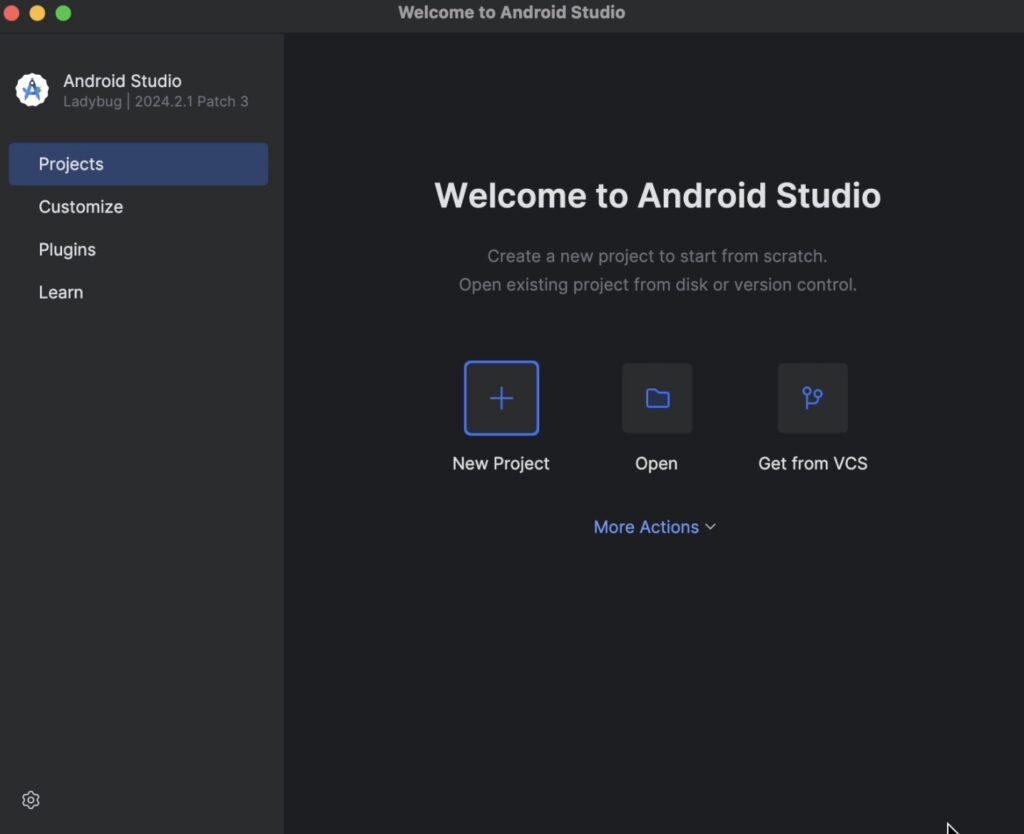
The Android Studio should be up and running now.
Set Up an Android Emulator
To run the SailViewer app, you’ll need an Android Emulator. Follow the steps below to create and configure one.
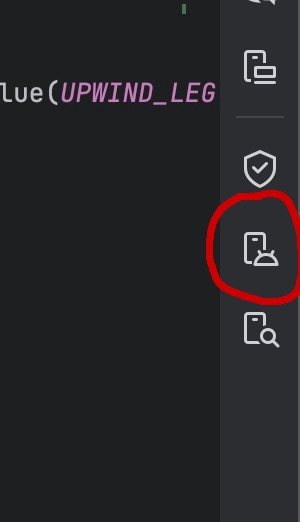
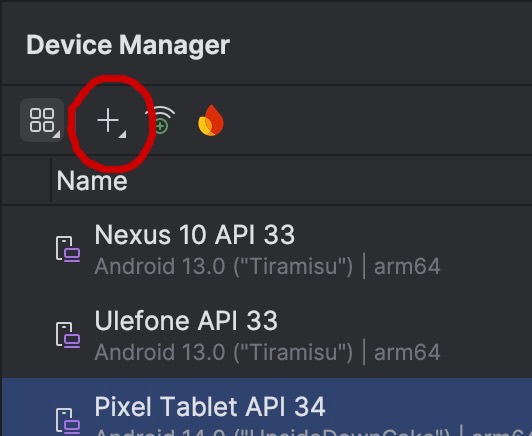
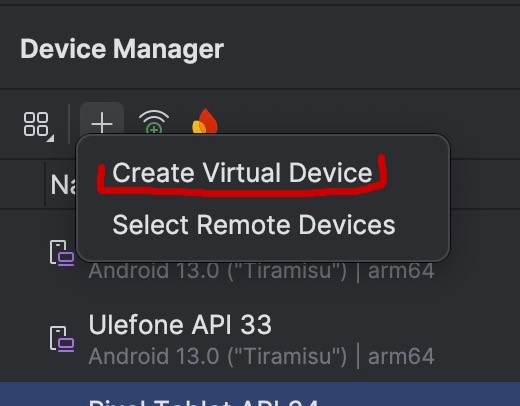
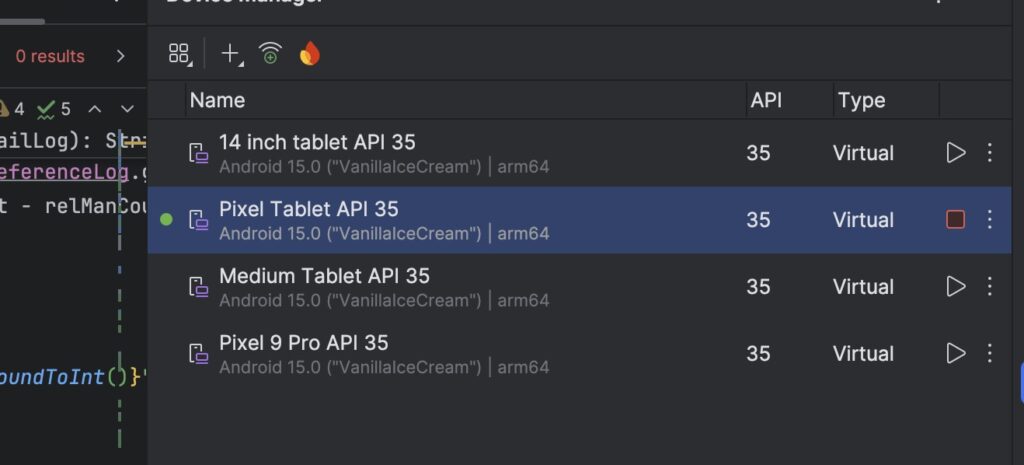
1. Open Device Manager by clicking the icon in the top-right corner of Android Studio. If you don’t see the icon, search for Device Manager in the Android Studio search box.
Click Plus Symbol and choose Create Virtual Device.
Choose a device that includes the Google Play logo.
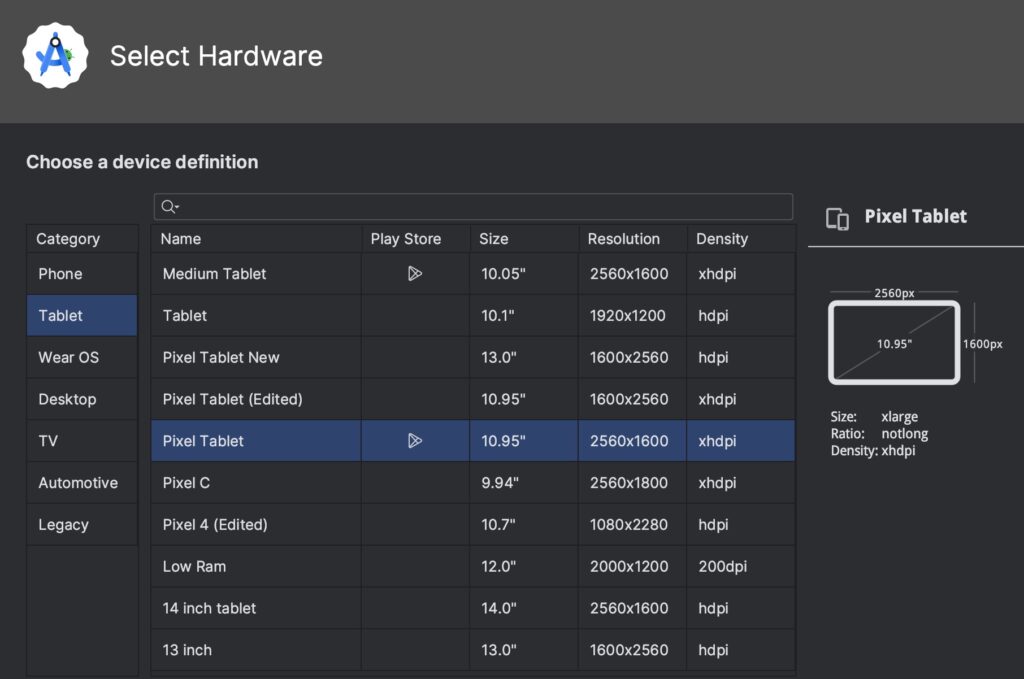
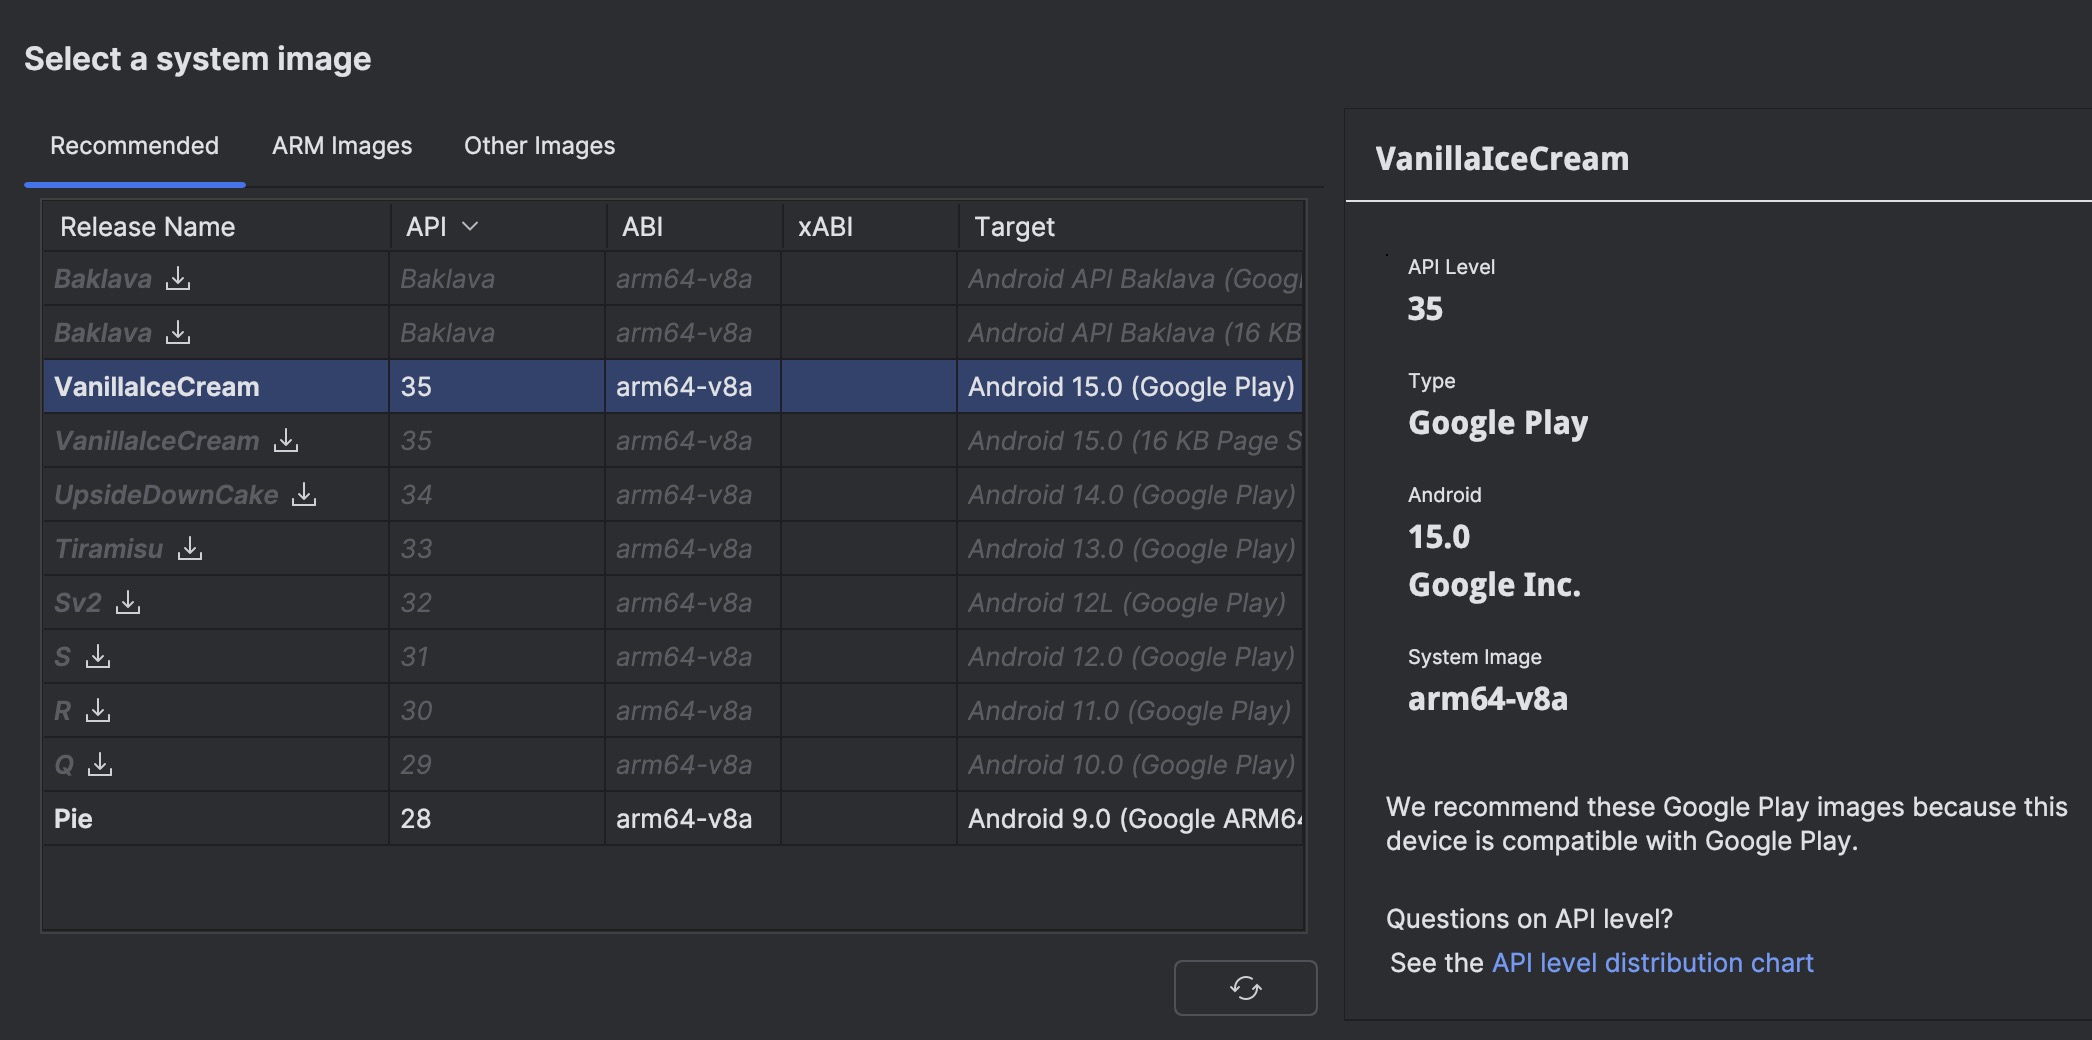
Select the Latest Official Image. It should have Google Play next to it.
If an image has a download arrow next to it, click it to download the system image before proceeding.
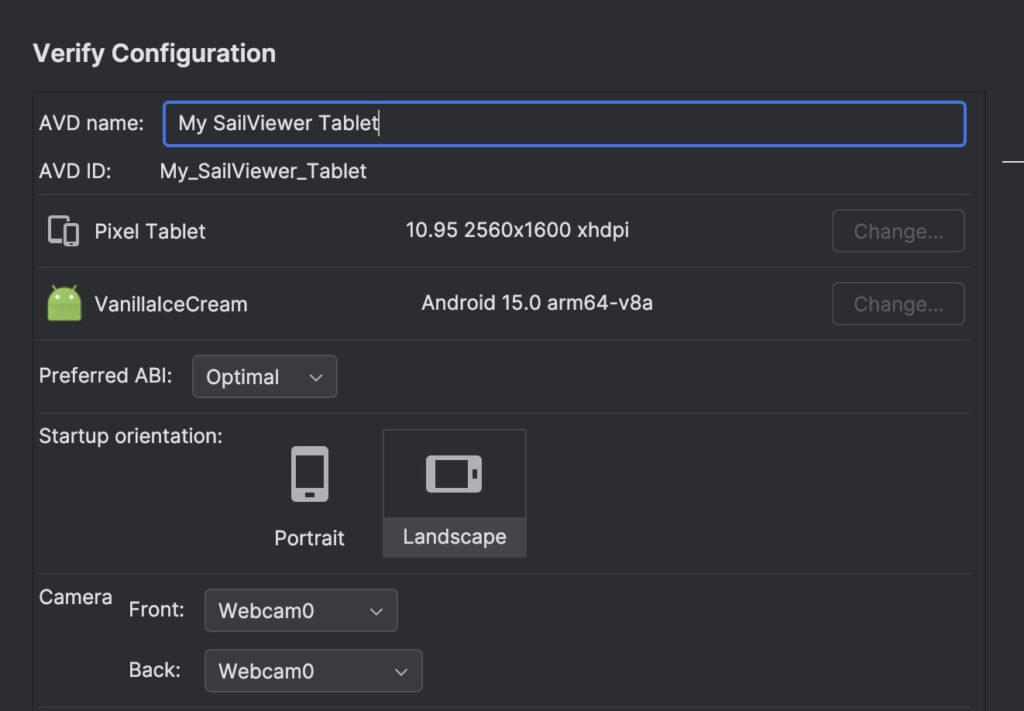
Give your emulator a name and use the settings as shown below.
The Internal Storage setting determines how much space your virtual tablet will have for storing files. If you plan to add a lot of logs, videos, or other files, it’s recommended to increase the storage to 16GB or more. This ensures you have enough room for all your data without running into storage limitations.
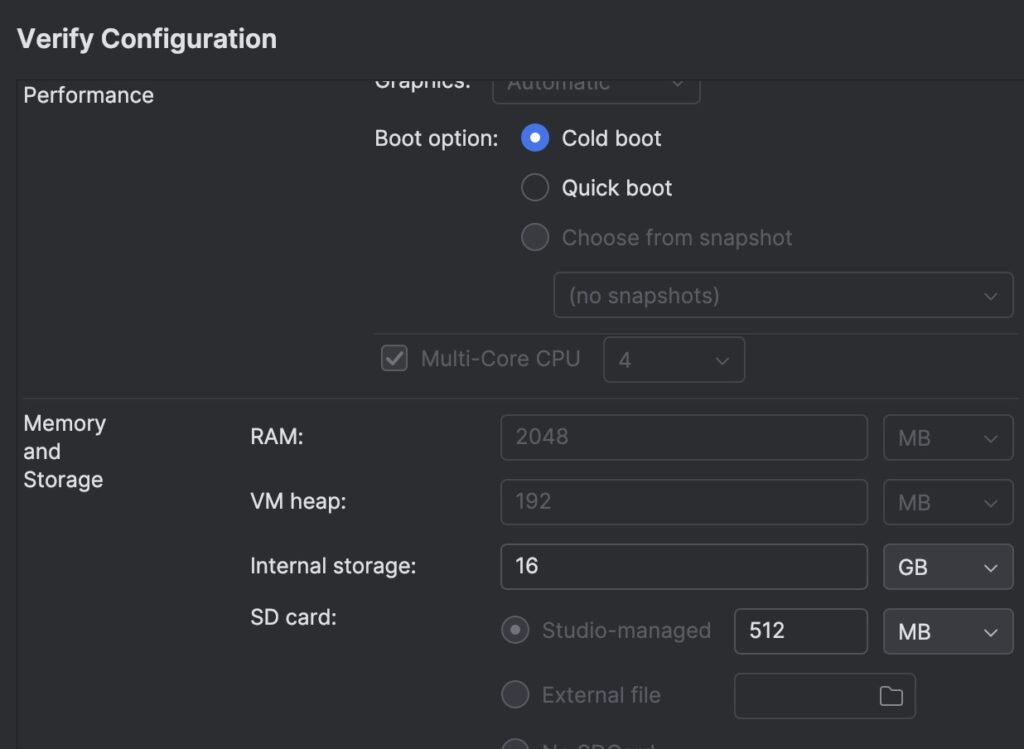
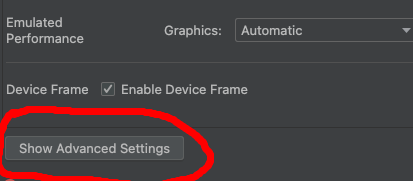
Click “Show Advanced Settings” and set them up as shown below.
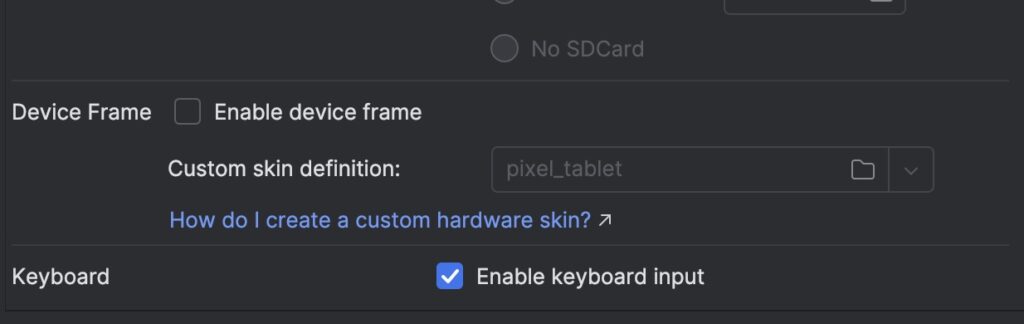
In case you cannot click the “Finish” button, make sure that Skin is selected as No Skin from the top of the skin menu.
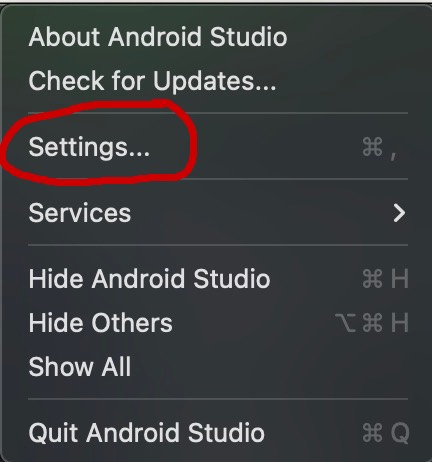
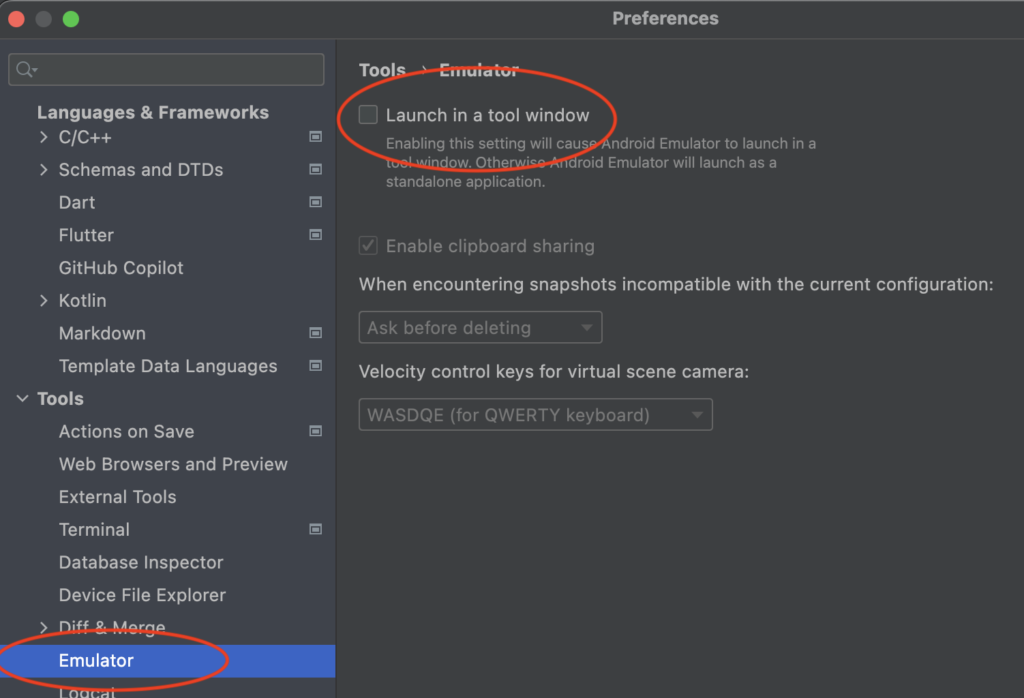
To prevent the emulator from running inside Android Studio:
1. Open Settings in Android Studio.
2. Navigate to Emulator Settings and enable the option to run the emulator in a separate window.
3. Restart the emulator for the changes to take effect.
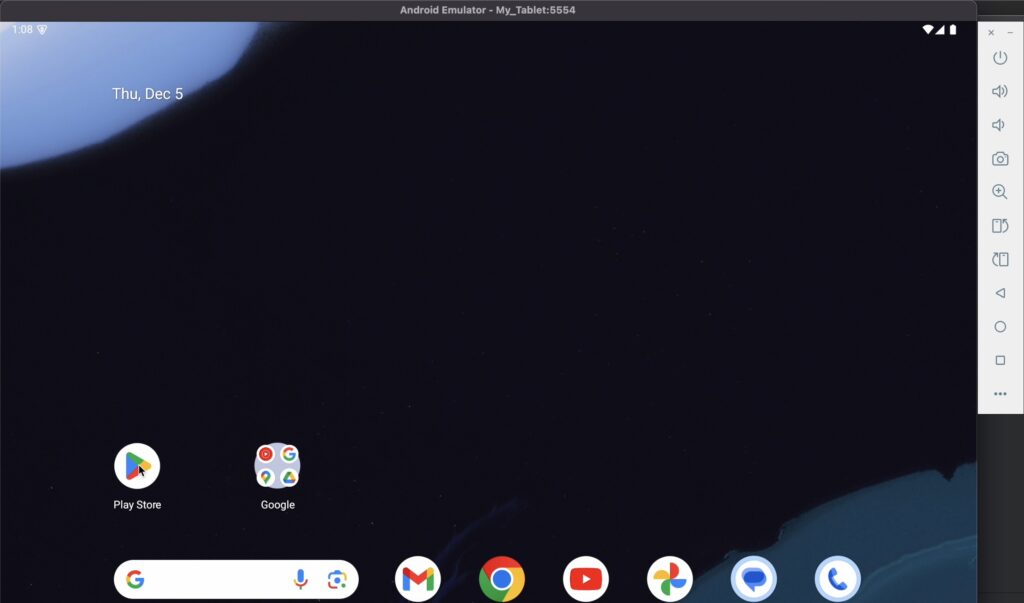
Start the Emulator
Once configured, the emulator will appear in the Device Manager list. Click the Play arrow next to it to start the emulator. You can delete the emulators you are not using.
Tip: On Macs with limited RAM, close Android Studio after starting the emulator to free up resources. To restart the emulator, reopen Android Studio, load your project, and launch the emulator again.
Install the SailViewer App
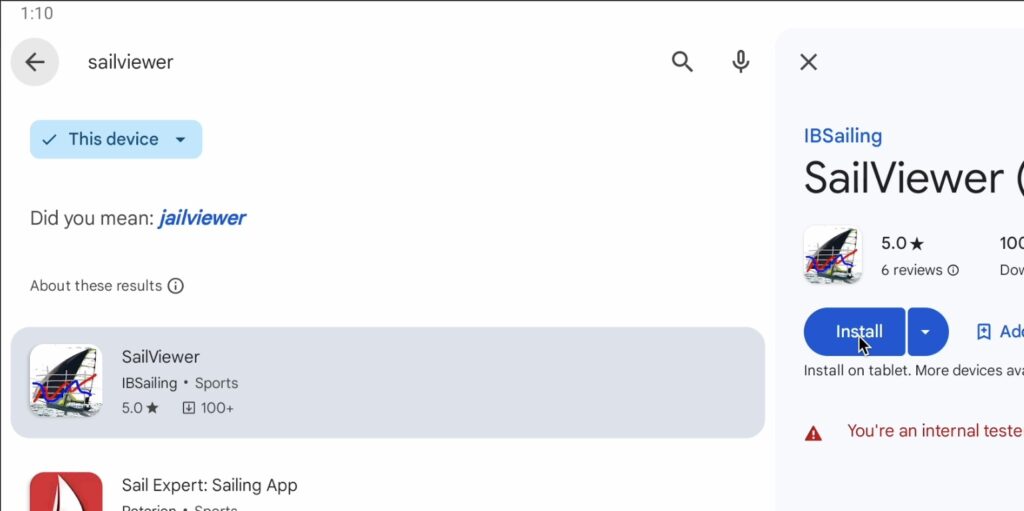
1. Open Google Play on the emulator.
2. Log in with your Google account.
3. Search for SailViewer and install the app. Search button is on the left side of screen.
Transferring Logs To Emulator
Drag and Drop
1. Drag the log file from Finder and drop it onto the emulator window.
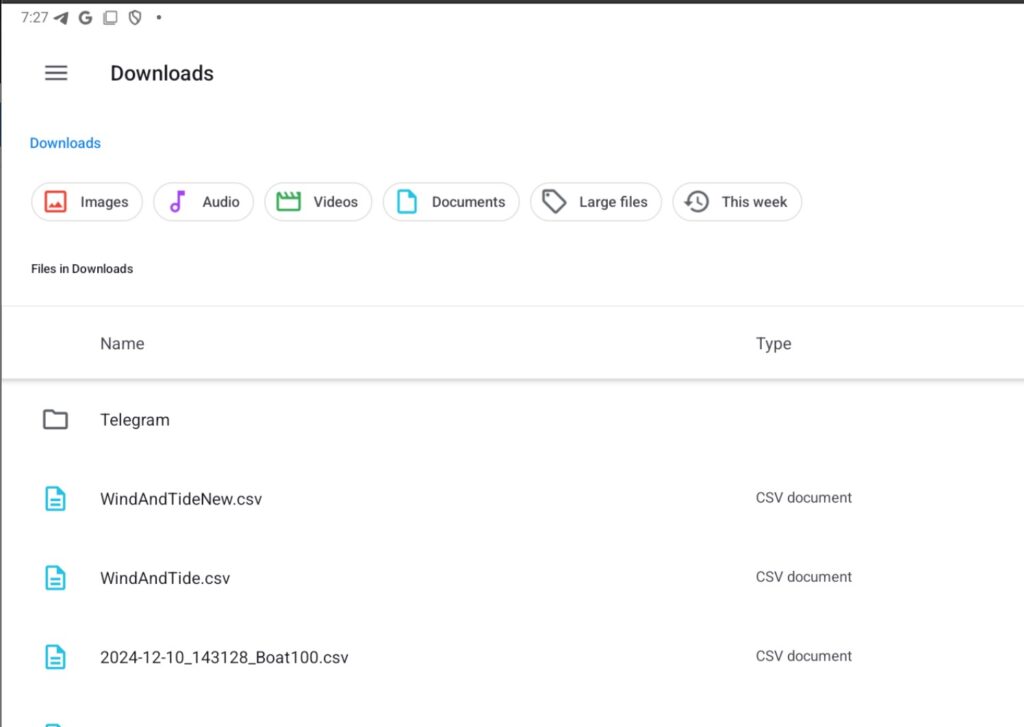
2. The file will be saved in the emulator’s Downloads folder.
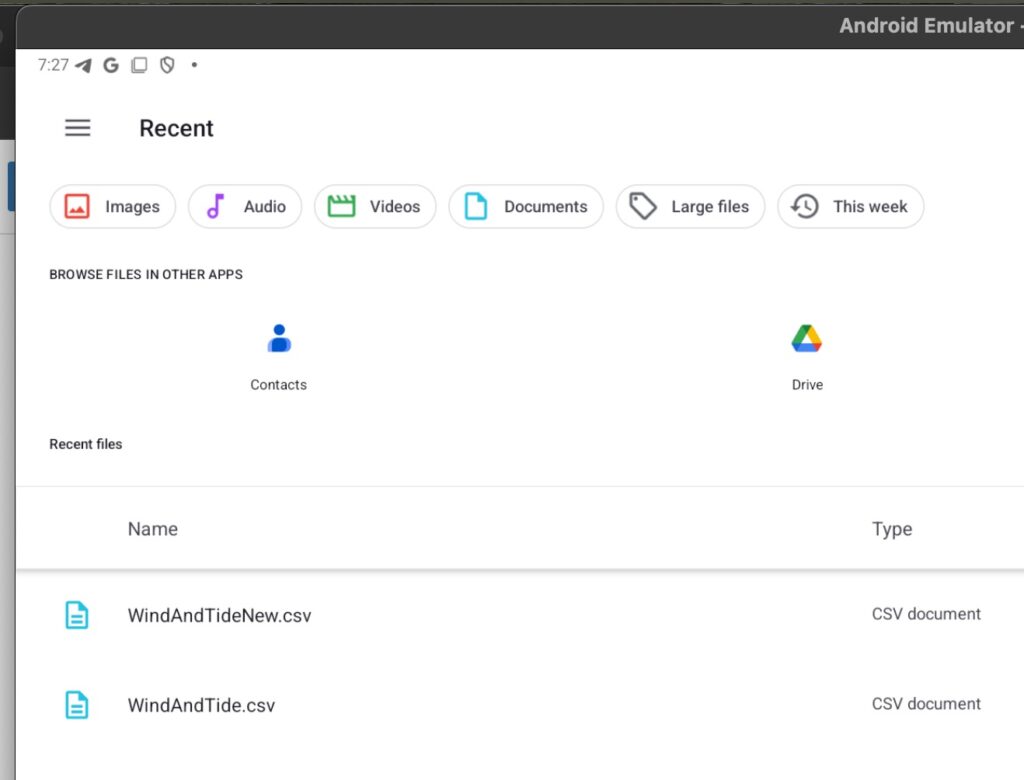
3. In SailViewer, go to Import and select the Downloads folder to locate your files.
Set up the Gmail app or another email app in the emulator to receive logs via email.
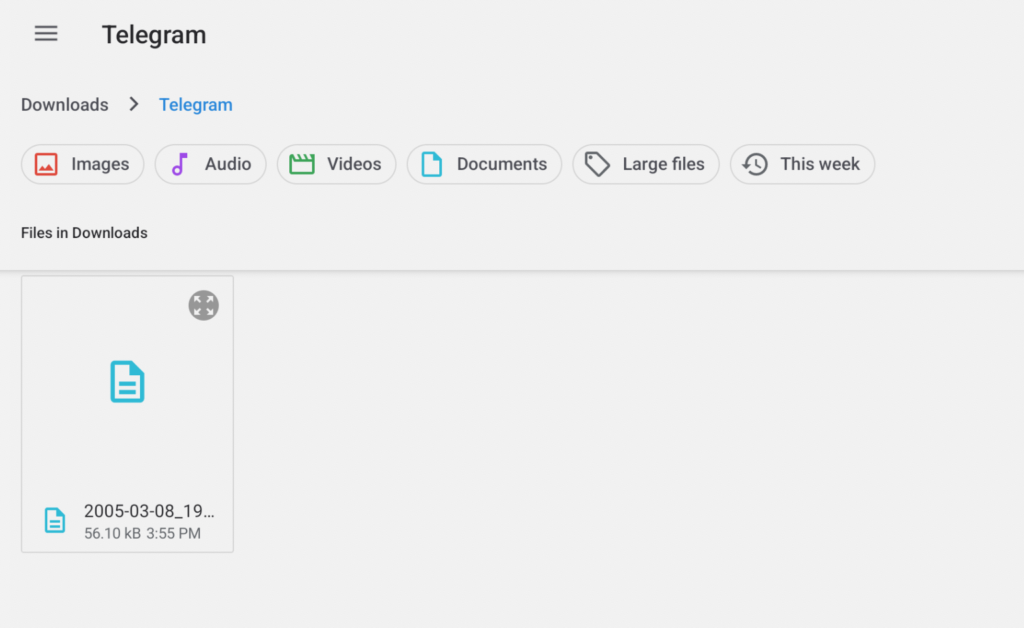
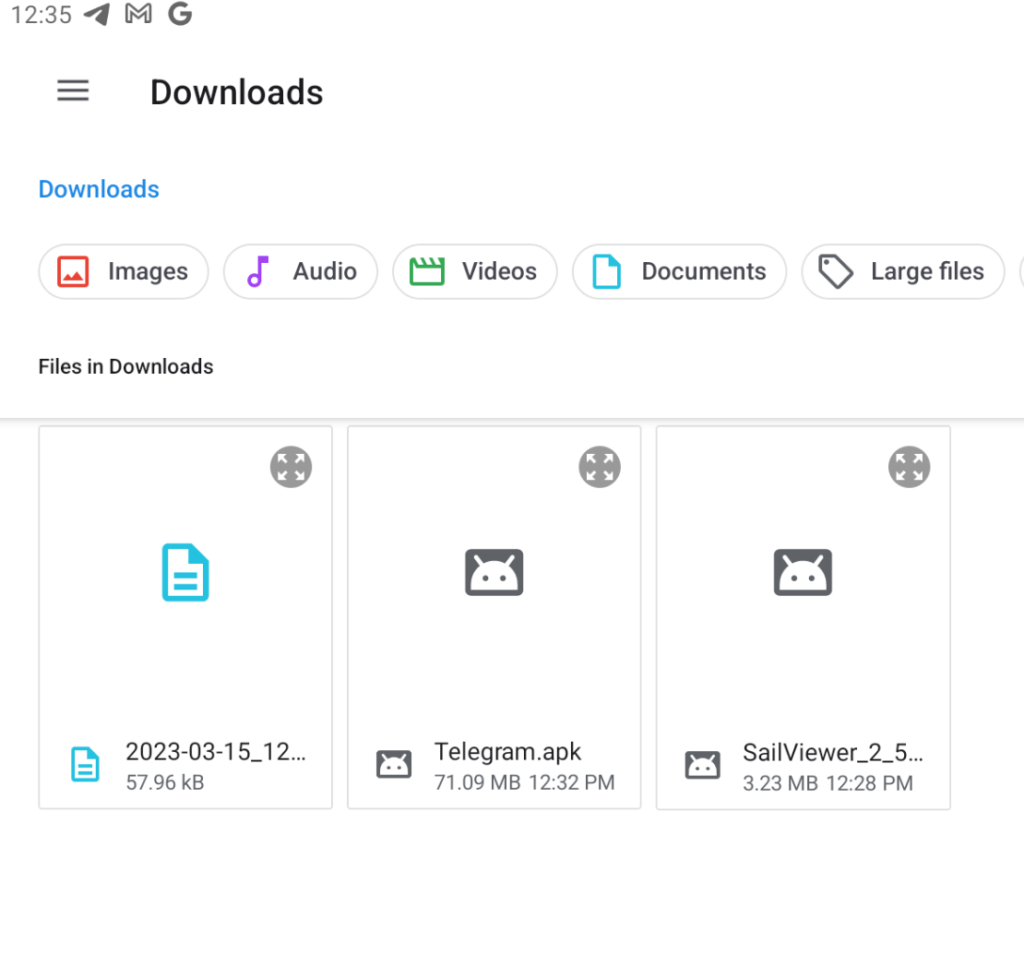
Telegram
1. Install the Telegram app on the emulator.
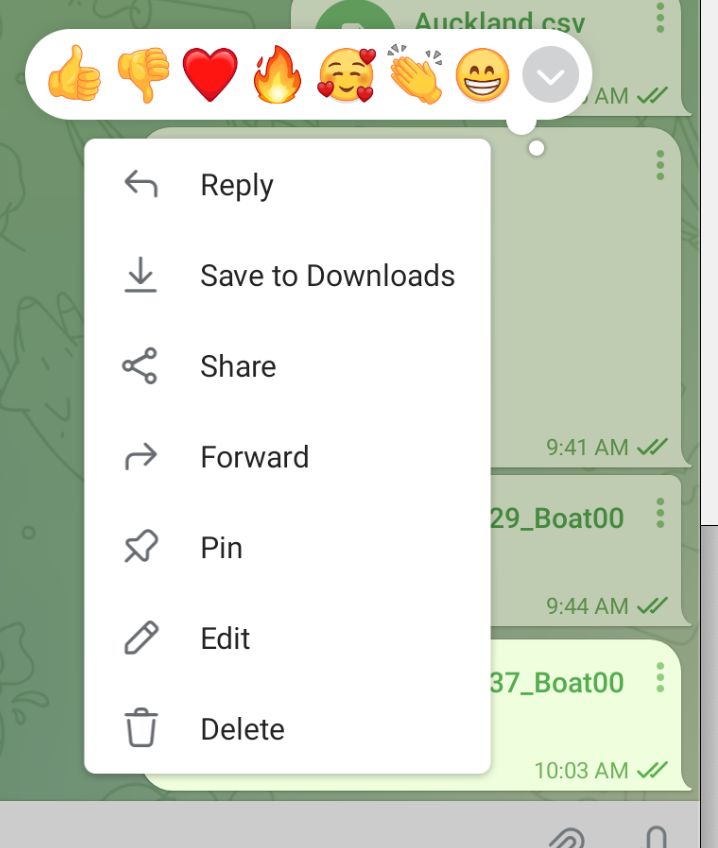
2. Send the log files to your Saved Messages in Telegram.
3. On the emulator, open Telegram, locate the files, and choose Save to Downloads.
4. The files will appear in the Telegram folder inside the emulator’s Downloads directory.
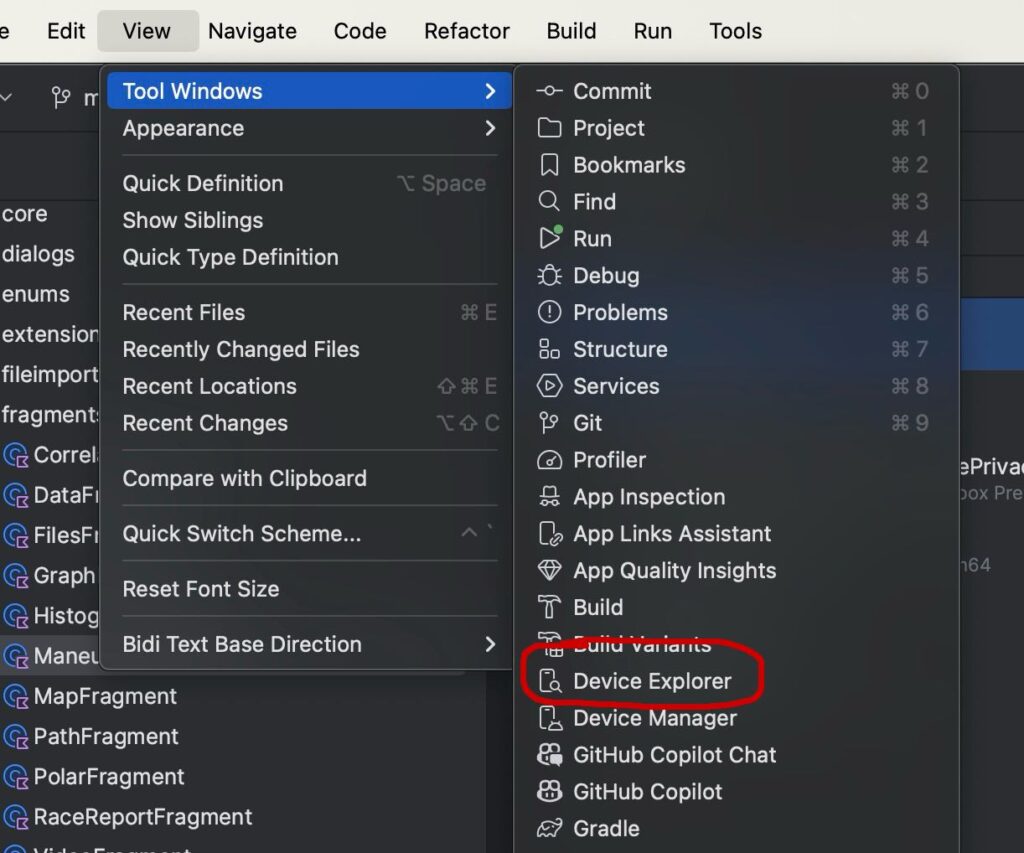
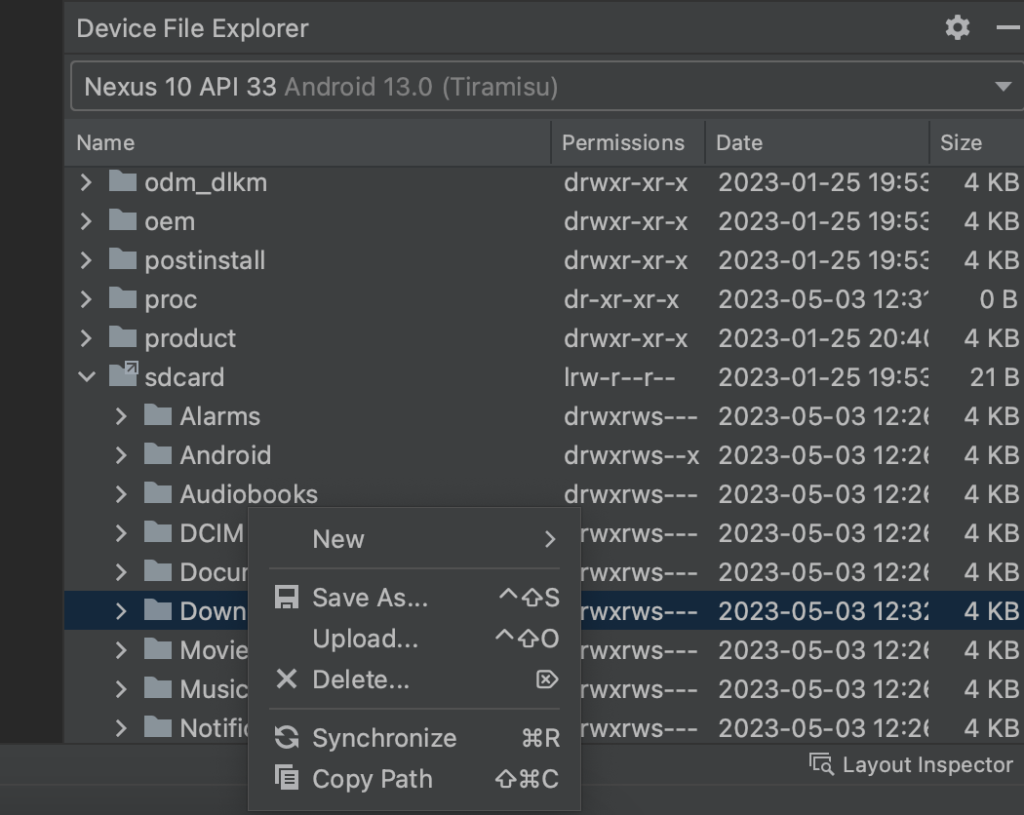
Uploading Files from Android Studio to Emulator
1. Open the Device Explorer in Android Studio.
2. Navigate to the sdcard folder, then the downloads folder.
3. Right-click on downloads and choose Upload.
4. Select the log files from your Mac, and they will be added to the emulator’s Downloads folder.
By following these steps, you’ll have SailViewer running smoothly on your Mac, ready to analyze and enjoy your sailing logs.